CI/CD pipelines are a whole lot easier with Docker. In the days you needed a build server set up with all the tools your app needed - Maven, NuGet, make, MSBuild, NUnit - and the versions needed to be kept in sync with the whole team otherwise you got crazy errors.
With Docker multi-stage builds your Dockerfile is the build server :) All you need in your CI/CD pipeline is something that can run docker commands. In this exercise you’ll see how to run Jenkins in a container and use it to build an app, package it in a Docker image and publish it to Docker Hub.
1. Start Jenkins
The source code repo for the sample app includes a Docker Compose file to run Jenkins. Start by cloning the repo:
git clone https://github.com/sixeyed/pi.git && cd pi && git checkout bday7
And now run the Jenkins compose file:
docker-compose -f jenkins.yml up -d
That starts a custom deployment of Jenkins built from this Dockerfile. It installs all the plugins the build needs and configures the pipeline, so this is a portable Jenkins server just for this project.
Browse to Jenkins and click log in at the top right of the screen. Log in with username pi and password pi (you may have to wait a few moments for Jenkins to start up).
2. Add your Docker Hub token
Your Jenkins server is configured to build a simple app, run some tests and push the image to Docker Hub. To push to Docker Hub you need to give Jenkins your credentials, but don’t use your Docker Hub password - create an access token which you can delete after the exercise.
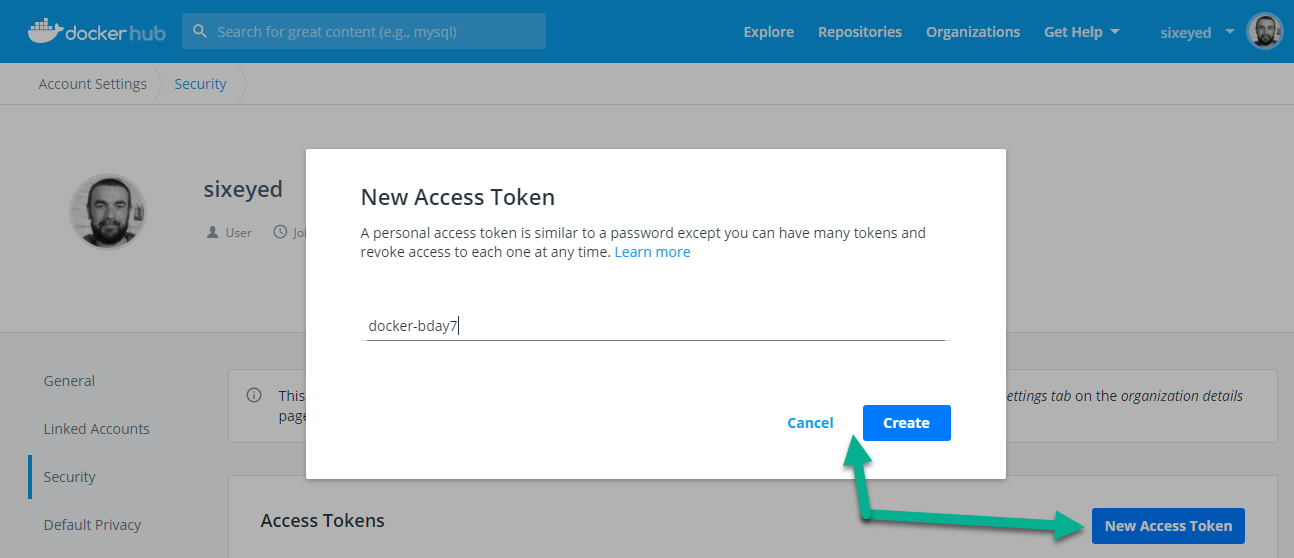
Browse to https://hub.docker.com/settings/security and click New Access Token. Give the token a name and click Create:

Hub generates an access token for you. Be sure to copy it to the clipboard, you can’t view it again.
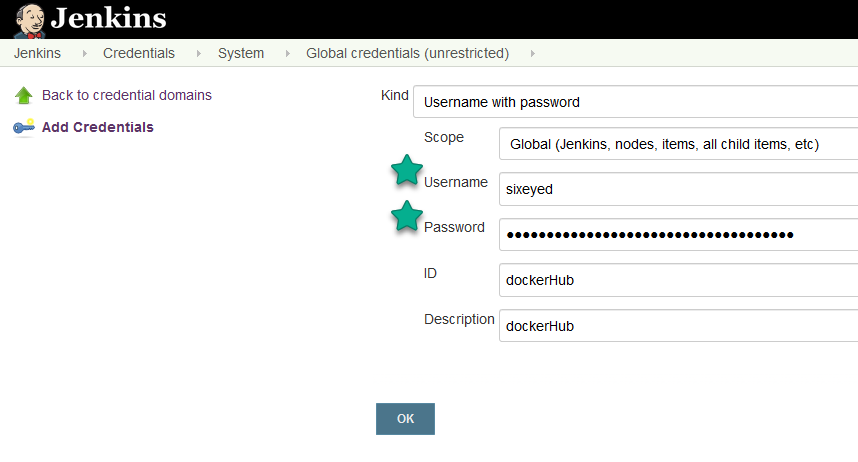
Now head to the Jenkins credentials page and click Add Credentials. Enter a new credential called dockerHub:

- for Username use your Docker Hub ID (not your email address)
- for Password use the Hub access token you just created
- for ID use
dockerHub - for Description use
dockerHub
3. Build and share!
Browse to the Pi job in Jenkins. You may see a job there which has failed at the Push stage - that’s because it ran before you had entered your Docker Hub credentials :)
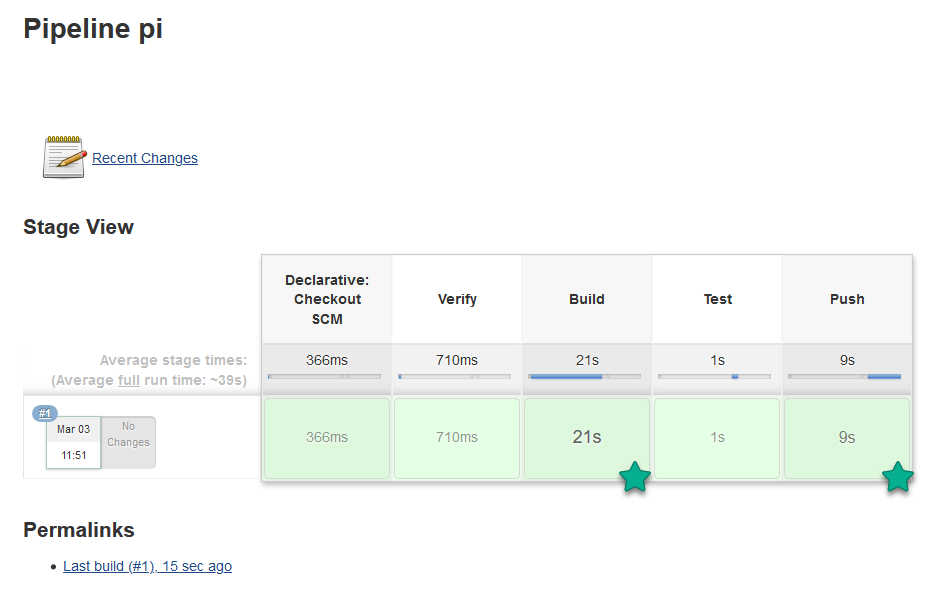
Click Build Now from the left menu to start a new build. As it progresses you can click the green blocks to view the logs for each stage. When it completes it looks like this:

The build pipeline uses this Jenkinsfile which is fairly simple - all the steps use docker and docker-compose commands:
- Verify prints out the versions of the Docker components
- Build builds the app using a multi-stage Dockerfile
- Test runs a container to test the app
- Push pushes the built image to Docker Hub
Check your Docker Hub page and you’ll see a new image there called pi, pushed by the Jenkins job.
So what actually happened?
Jenkins is running in a container, mounting a volume to use the Docker API. When the pipeline runs docker commands, they actually get executed on the same Docker Engine where Jenkins itself is running:

That gives you a very clean CI setup when you can run a Jenkins container on any Docker Engine, and you don’t need any pre-requisites. This is a .NET Core app, but you don’t need any .NET tools installed to build or run the app with Docker.
The Jenkins pipeline steps use Docker for all the hard work, the Jenkinsfile really just states the workflow. This example uses GitHub for source control and Docker Hub for distribution, but you could swap those out for self-hosted options in containers if you wanted to run your whole pipeline on your laptop :)
4. Test the app
The demo app calculates Pi to a specified number of decimal places. In the build pipeline you can see the container running in the test stage, printing out Pi to 6 decimal places.
You can also run the container as a web app:
docker container run -d -p 80:80 pi:bday7 -m web
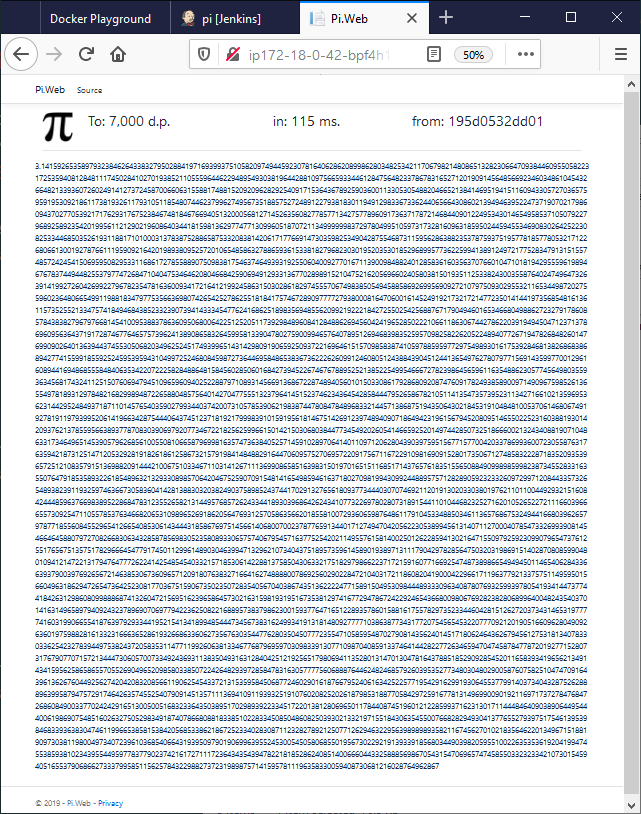
Now browse to the application and you’ll see Pi. You can add a ?dp= querystring to your URL to calculate Pi to a larger number of decimal places - this is computationally expensive, so it can be a useful benchmark:

You can run that same app anywhere because it’s now publicly available on Docker Hub, under your username :)
This was a simple introduction to a CI pipeline using Jenkins in a Docker container and publishing to Docker Hub. The great thing about this is it’s super simple to spin up, so even if you’re mainly using a managed build service like GitHub Actions or Docker Hub automated builds, you can easily run your own version if you need more flexibility, or if the service goes offline…
If you want to learn more, check out:
- Learn Docker in a Month of Lunches by Docker Captain Elton Stoneman which has chapters on Dockerized CI/CD pipelines
- The DevOps 2.6 Toolkit by Docker Captain Viktor Farcic, which looks at CD with Kubernetes and Jenkins X.
Quiz
How do Docker multi-stage builds make CI pipelines simple? Select only one option
- ( ) You can define your dependencies by linking to GitHub repos
- (x) You don’t need any tools to build the app, the only pre-req is Docker
- ( ) You can run a VM using the build image named in the Dockerfile
What’s the recommended way to run Jenkins in a container and use Docker inside Jenkins jobs? Select only one option
- (x) Mount the Docker API socket as a volume
- ( ) Run Docker-in-Docker inside the Jenkins container
- ( ) Expose the Docker API on a TCP/IP port and connect from inside Jenkins
Why should you run tests using containers in your CI pipeline? Select only one option
- ( ) You can easily use them for user testing toom just by publishing ports
- ( ) You can leave containers running between builds and save on startup times
- (x) You can quickly spin up the whole app and run full end-to-end tests


