Istio is a service mesh - a software component which manages the network communication for your applications. It’s an architecture which works really well for distributed applications running in containers on Kubernetes, and you can try it out using Docker Desktop.
In this lab you’ll learn how to deploy the demo installation of Istio on Docker Desktop and run a simple demo app. You’ll gain experience of some of the core features of Istio: using traffic management for canary deployments, applying encryption in transit with service authorization, and monitoring communication.
1. Configure Docker Desktop
You’ll need Docker Desktop installed with Kubernetes running - you can follow the steps from the lab Getting Started with Kubernetes on Docker Desktop.
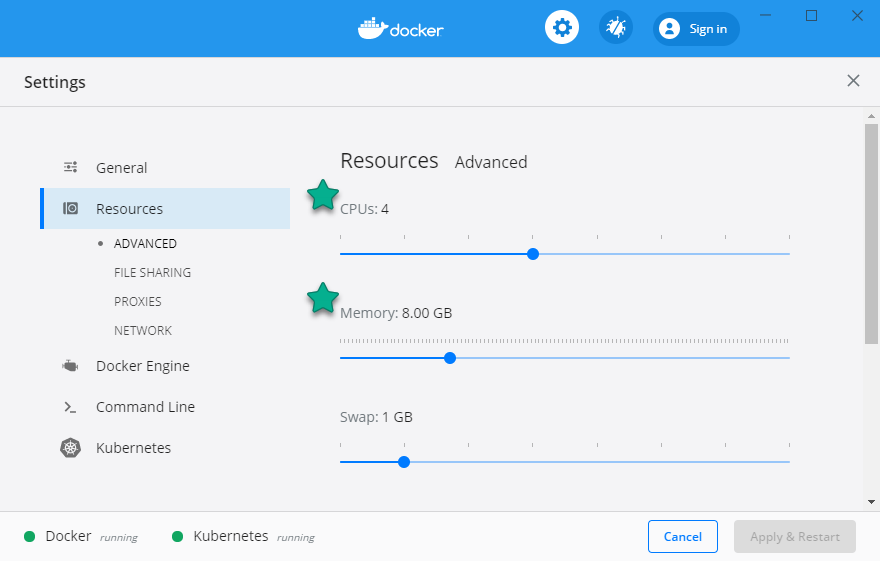
Istio runs in containers and you’ll need to give Docker Desktop some extra memory so it can run everything. Click on the Docker whale icon in the taskbar on Windows or the menu bar on Mac and click Settings. Under the Resources tab increase the memory slider to at least 6GB - increasing CPU cores to at least 2 would be good too:
 )
)
2. Deploy Istio
Istio runs as a Kubernetes application itself. You can deploy it in different ways (typically using the Istioctl command line, or with the Meshery tool if you’re comparing different service meshes), but the simplest is with kubectl.
The Istio demo application manifest runs all the features of Istio and it works in the same way on Docker Desktop or on a multi-node Kubernetes cluster in the cloud:
kubectl apply -f https://raw.githubusercontent.com/docker/docker-birthday/master/resources/istio-docker-desktop/istio.yaml
It will take a while for all the Istio components to download from Docker Hub and start running. Check on the status by watching the Istio pods:
kubectl get pods -n istio-system --watch
When all the pods have a status of either Running or Completed, then you have Istio running locally. Hit Ctrl-C to exit out of the watch command.
You can check the Istio architecture docs for more information on what the Mixer, Pilot and Citadel components actually do.
3. Deploy an Istio-managed app
Apps can run in your Kubernetes cluster alongside Istio without Istio doing anything - the network is only managed by Istio when you register components with the service mesh. You can do that manually by updating your Kubernetes manifests with Istioctl or you can have Istio automatically register apps.
Istio does that by looking for a label on the Kubernetes namespace. This Kubernetes manifest for the Docker sample voting app is configured with a namespace label which means all the application components will be registered with Istio.
Deploy the sample app, which will automatically be registered with Istio:
kubectl apply -f https://raw.githubusercontent.com/docker/docker-birthday/master/resources/istio-docker-desktop/vote.yaml
If you see any errors, it’s because Kubernetes doesn’t create all the resources in order. Just repeat the command and it will work correctly :)
The sample app is created in a Kubernetes namespace called vote. Check the details of the namespace:
kubectl describe namespace vote
You’ll see the namespace has a label applied istio-injection=enabled. That’s the flag which Istio looks for - any pods created in a namespace with automatic injection will be registered with the service mesh.
Check the application is running:
kubectl get pods -n vote --watch
When all the pods have a status of Running, the app is good to go. Exit out of the watch command with Ctrl-C.
You’ll see
2/2in theREADYcolumn for all the pods, which is the number of running containers. Each pod has one application container and one network proxy container, injected by Isito.
4. Rollout a canary deployment
The app you’re running is the Docker sample voting app. You can cast a vote at http://localhost:5000 and see the results at http://localhost:5001.
It’s a distributed app which uses a Redis message queue for communication and a Postgres database for storage - with application components written in Python, .NET and Node.js. Right now all the communication is going through Istio, but it’s not doing anything much because we haven’t configured any Istio resources.
Istio’s main feature is traffic management. You can set up routing rules to send traffic to a different target from the one the client actually requested. You can use that for dark launches of new features and blue-green deployments. We’ll use it for a canary rollout of a new version of the vote component:
kubectl apply -f https://raw.githubusercontent.com/docker/docker-birthday/master/resources/istio-docker-desktop/vote-v2.yaml
Browse to http://localhost:5000 again and you’ll see the voting page. Refresh a few times and you’ll sometimes see the original v1 site and sometimes this new v2 site:
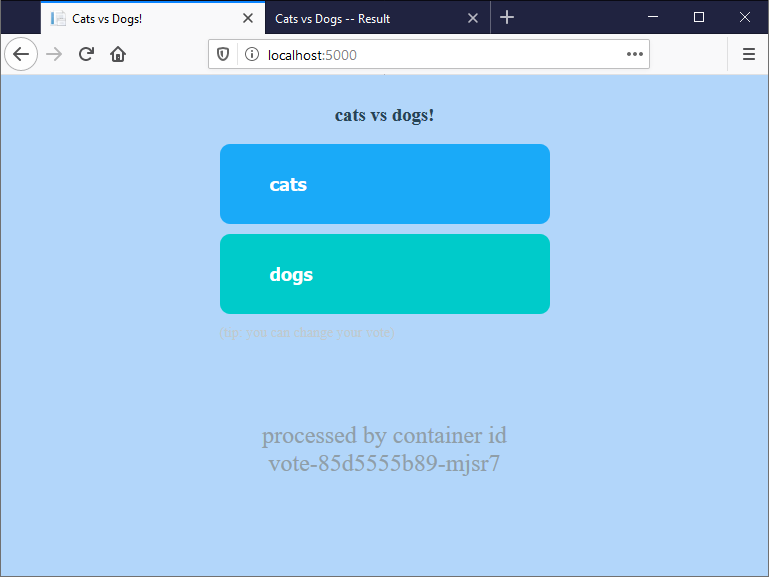
The Kubernetes YAML file you applied contains Istio routing rules which send 70% of traffic to the v1 voting site, and 30% to v2. Istio listens for all incoming traffic on port 5000, and sends it to a pod based on the routing rules. You can continue the canary rollout by altering the route weights in the YAML file.
5. Apply service authorization
Istio can encrypt network traffic and apply authentication and authorization rules. Each component of the voting app uses its own Kubernetes service account, and Istio uses the service account to authenticate - so services know the identity of clients making network calls.
You can apply authorization rules based on the client identity, which is useful for restricting access to key components. Right now any component can access the Postgres database, which is a security hole.
Pretend you’re a hacker and you’ve gained access to the container running the vote site:
kubectl -n vote exec -it svc/vote sh
You have admin rights inside the container, so you can install the Postgres client tool psql, and use it to connect to the voting database:
apk add postgresql-client
psql -h db -U postgres
\d
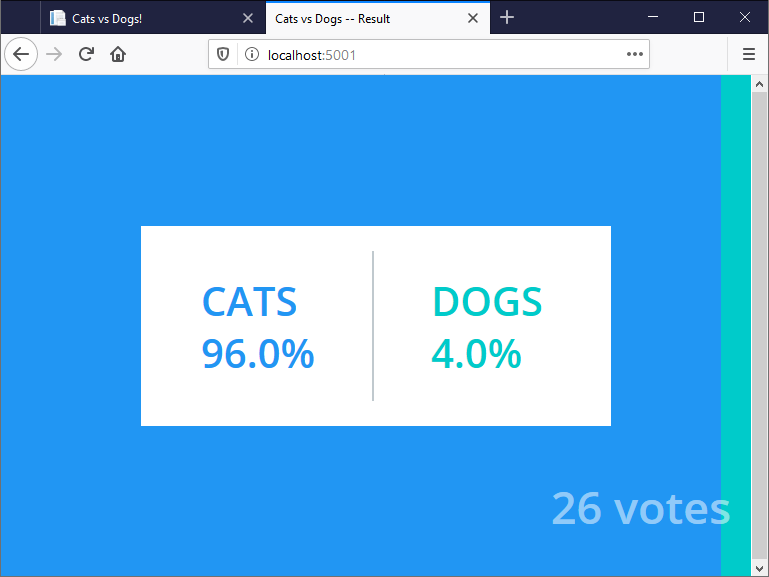
You’ll see a list of database tables, including the votes table where all the data is stored. You can update data too - try running INSERT INTO votes(id,vote) VALUES(random()::text, 'a'); a few times and then refresh the results page at http://localhost:5001. You’ve just rigged the vote:
Istio can fix that for us. First exit the psql session and then exit the container:
\q
exit
Now apply a set of Istio security policies which enforce mutual TLS encrypted communication between the components, and restrict access to the database:
kubectl apply -f https://raw.githubusercontent.com/docker/docker-birthday/master/resources/istio-docker-desktop/authz.yaml
The policies mean the Python front end isn’t authorized to send traffic to the database. Put on your hacker hoodie and try again:
kubectl -n vote exec -it svc/vote sh
You’re still an admin on the container, but if you try to connect to Postgres:
psql -h db -U postgres
This time you’ll see an error could not connect to server. This is Istio enforcing network policy - the vote component is blocked from sending traffic to the database.
Nothing you can do here, voting is safe. Time to move on:
exit
6. Visualize the service mesh
All network traffic goes through Istio and it can record metrics about all communication. The demo configuration runs a Prometheus instance and sends metric data to it. You can surface that data in different Istio dashboards, and the simplest (and one of the most useful) is a service graph.
The demo Istio install also includes the Kiali service graph visualizer. Its already runnin, you just need to enable access by deploying routing rules for Kiali:
kubectl apply -f https://raw.githubusercontent.com/docker/docker-birthday/master/resources/istio-docker-desktop/kiali.yaml
Browse to Kialai at http://localhost:15029 and sign in with the username admin and password admin (it is a demo deployment…).
Click on Graph from the left-hand menu and select the vote namespace in the dropdown at th top of the graph page. You’ll see something like this:
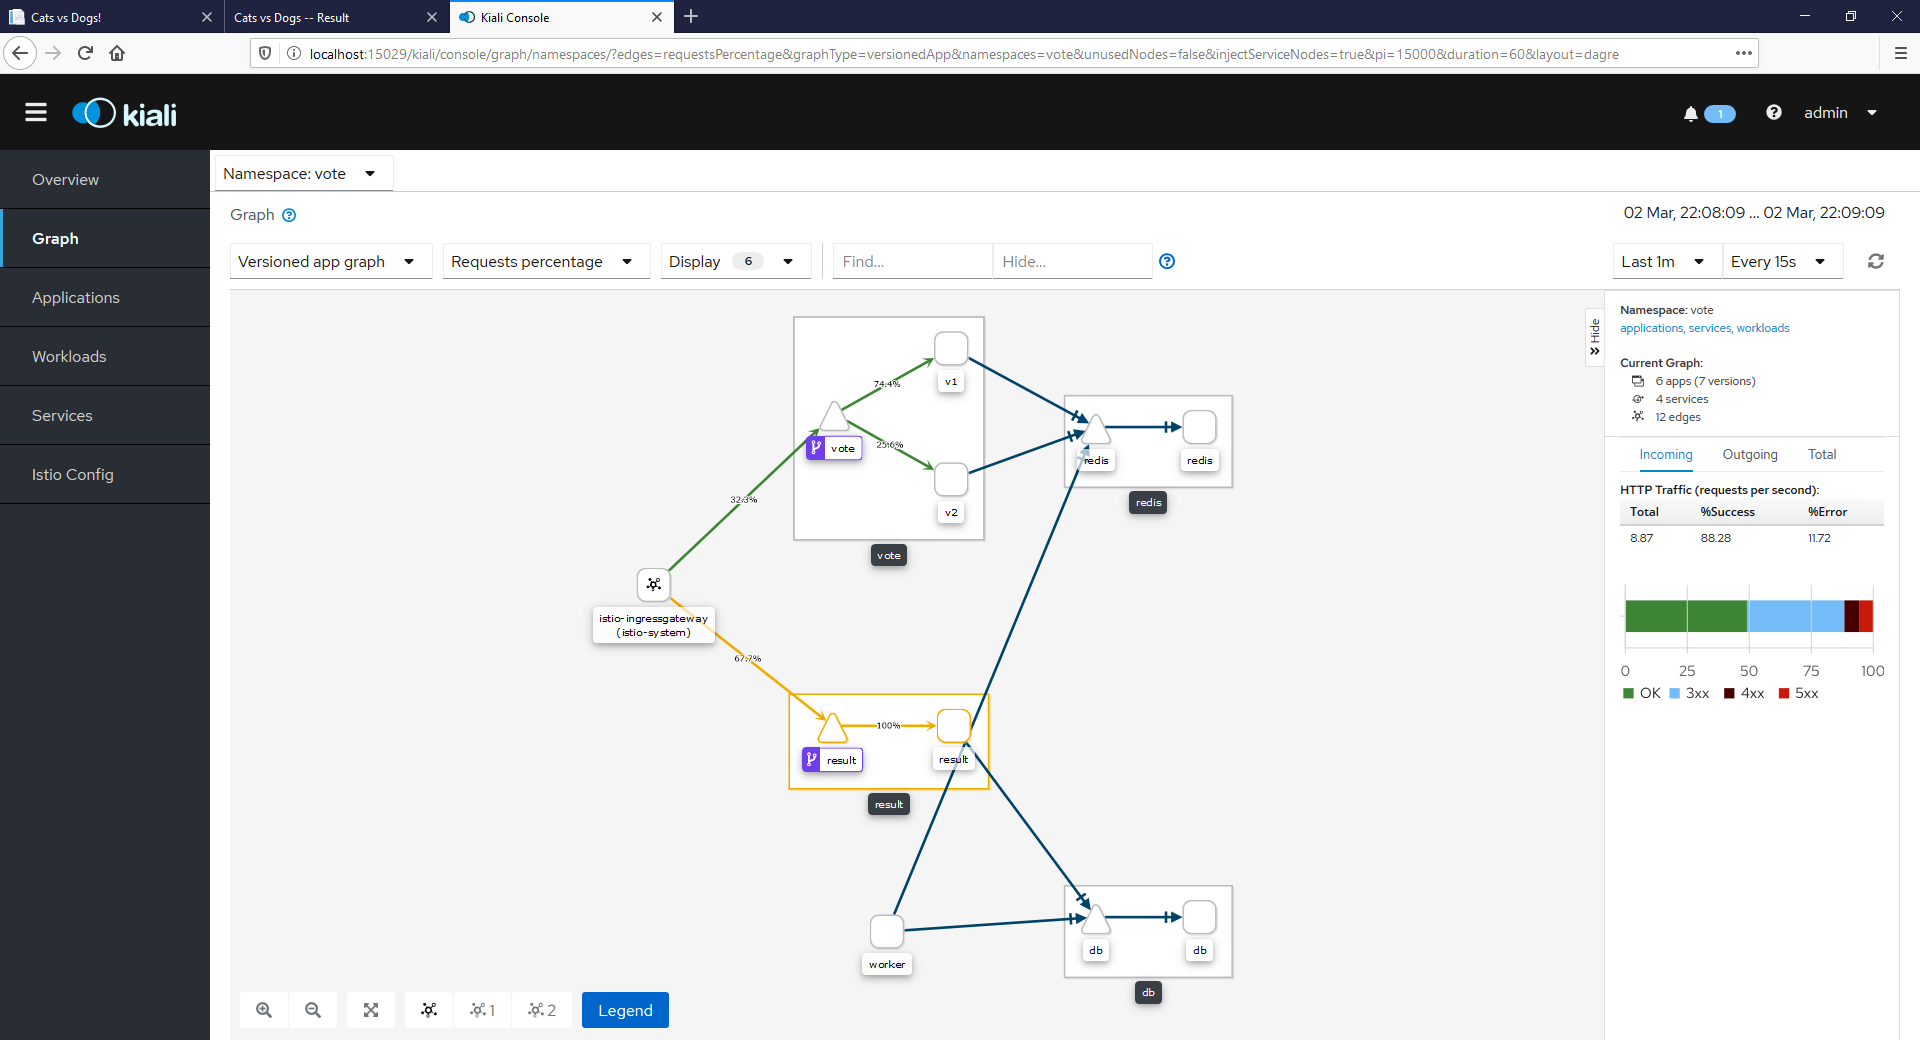
That’s a live graph of traffic going through your application, and you can see high-level details like the response statuses and the traffic split for your canary deployment.
This was a very quick introduction to Istio, showcasing some of the major features in traffic management, security and observability. If you want to learn more, check out:
- the book Istio: Up and Running by Docker Captain Lee Calcote
- the Pluralsight course Managing Apps on Kubernetes with Istio by Docker Captain Elton Stoneman
- the Docker virtual meetup - Getting Started with Istio.
7. Teardown your environment
Docker Desktop has a feature to tear down your whole Kubernetes cluster and reset it to the original state. Open the settings from the Docker whale icon and click Kubernetes. Click the Reset Kubernetes Cluster button and the demo app and Istio will all be gone.
Quiz
What kind of features does Istio provide? Select only one option
- ( ) Load balancing, service discovery and healthchecks
- (x) Traffic management, security and observability
- ( ) Security, service discovery and node access
How do you use Istio for canary deployments? Select only one option
- (x) Use routing rules to send different percentages of traffic to different application versions
- ( ) Deploy multiple versions of the app and use a Kubernetes service to load-balance between them
- ( ) Apply mutual-TLS and restrict traffic to the old version of the application
What security features does Istio provide? Select only one option
- ( ) Certificate management for private and public TLS certs
- ( ) Mutual-TLS for components inside and outside of the service mesh
- (x) Encryption with mutual-TLS, and access with authentication and authorization